Removing Lead Paint Safely in Your Home

Dots
Posted by: qpaint_admin / October 30, 2025

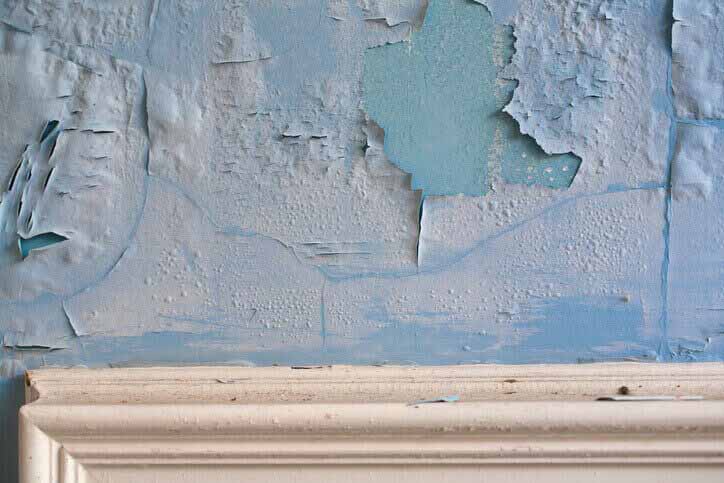
Lead‑based paint was commonly used in New Zealand homes built before the late 1970s. Its durability may have kept your trim or weatherboards looking good for decades, but once the surface begins to flake or is sanded during a renovation, invisible particles of lead can contaminate your home and endanger your family. Children under six and pregnant women are particularly vulnerable: even small exposures can cause developmental delays, learning difficulties and behavioural issues, and in adults lead has been linked to cardiovascular problems, kidney damage and nerve disorders. 

Older houses may have layers of modern paint covering older lead‑based layers, making it difficult to tell by appearance alone. New Zealand has introduced stricter standards limiting lead content in all paints to 90 parts per million and lowered the threshold for formal notification of elevated blood lead levels. With these risks and regulations in mind, this guide explains how to identify, contain and remove lead paint safely. If you feel unsure at any stage, the safest option is to hire trained professionals. Our Qualified Painters team has the experience and equipment to manage hazardous paint removal.

Understanding the danger of Lead Paint

Lead is a heavy metal that can enter the body through inhalation or ingestion of dust. When old paint is dry‑sanded or heated, microscopic particles are released into the air where they can be inhaled or settle on surfaces. In small children, there is no safe level of exposure: ingestion of dust or chips can cause developmental delays, attention disorders and reduced IQ. In pregnant women, lead can cross the placenta and harm the developing baby. Adults exposed to lead may experience high blood pressure, kidney problems, infertility and cognitive impairment.

Because lead accumulates in bones and organs over time, even periodic exposure during DIY projects can add to the body’s burden. There are often no obvious early symptoms, so prevention and testing are vital.

How to test for Lead in your home

If your house was built before 1980 (or earlier), assume it may contain lead paint somewhere. The only way to confirm is to test the layers. There are two main options:

  1. DIY test kits: Hardware stores sell 5% sodium sulphide solutions and swab tests that change colour when lead is present. With the sodium sulphide test, you carefully expose the deepest paint layer and apply a drop of solution; a brown or black reaction indicates lead. Swab kits turn pink or red when they detect lead. Follow the manufacturer’s instructions closely, and test multiple surfaces.
  2. Professional testing: Public health units, paint specialists and environmental consultants can perform more accurate assessments. They may use X‑ray fluorescence (XRF) analysis or take paint chips to a laboratory. This option avoids scraping large areas and is advisable if you suspect extensive lead paint or want peace of mind.

If any area tests positive, assume the entire layer is hazardous and plan accordingly. Even if only one room contains lead paint, any sanding or demolition could spread dust throughout the house.

Encapsulation vs. Removal

When lead is detected, you have two choices:

  • Encapsulation: If the paint is intact (no peeling or chipping) and on a low‑wear surface, you can seal it in place by applying a specialised overcoat or several layers of modern paint. This barrier prevents dust from being generated, and the method is quick and inexpensive. However, it is only a temporary fix. Over time the underlying layer can crack, and any future renovation, bump or moisture damage could expose the lead. Encapsulation is not suitable for surfaces a child could chew or for high‑traffic areas.
  • Full removal: If the paint shows any deterioration, is on a surface that moves (doors, windows), or you plan to sand, drill or renovate the area, complete removal is the only way to permanently eliminate the hazard. While more labour‑intensive, proper removal ensures that no hidden lead remains to reappear later.

Because removal can release large amounts of toxic dust, many homeowners choose to hire professionals rather than risk contamination. Qualified Painters can provide both encapsulation and safe removal solutions tailored to your project. If you decide to DIY, follow the precautions below meticulously.

Protecting yourself: Essential Safety Gear

Lead paint removal is a hazardous task. The principal route of exposure is inhalation of dust, so personal protective equipment (PPE) is non‑negotiable. WorkSafe and health authorities recommend the following precautions:

  • Respirator: Wear a properly fitted P2 or P3 respirator (N95/N100) that meets the NZS/AS 1716:2012 standard. Single‑strap paper masks are insufficient. If using a disposable respirator, ensure it has two straps and a good seal around your face.
  • Coveralls: Use disposable, hooded coveralls to keep dust off your clothing and hair. Alternatively, wear old clothes you can wash separately. A hat or hood helps protect hair from dust.
  • Gloves and goggles: Wear nitrile or rubber gloves and safety goggles to protect hands and eyes from dust and chemical splashes.
  • No eating, drinking or smoking: Do not eat, drink or smoke in the work area. Lead dust can settle on hands and objects; always wash hands and face thoroughly before breaks.
  • Clean‑up routine: At the end of each session, remove your coveralls carefully to avoid shaking dust. Wash work clothes separately from other laundry and shower promptly.

Preparing your home for Safe Removal

Effective preparation prevents contamination of other rooms and minimises clean‑up time. Take the following steps:

  • Vacate and restrict access: Children, pregnant women and pets should leave the premises or stay far from the work zone until completion. Limit access to essential workers only.
  • Clear the area: Remove furniture, curtains, rugs and belongings from the room. For items that can’t be moved, wrap them securely in heavy plastic and seal with tape. Outdoors, place plastic sheeting on the ground to catch debris.
  • Seal floors and fixtures: Lay down thick polythene sheets over floors, built in and other horizontal surfaces. Tape all seams and edges so there are no gaps. Indoors, cover vents and doorways with plastic to prevent dust from escaping.
  • Close off the house: If you’re working outside, close nearby windows and doors to prevent dust drifting inside. Inform neighbours so they can do the same. Avoid working on windy days.
  • No open flames: Never use open‑flame torches or high‑heat guns on lead paint, as heating can release toxic fumes. Infrared tools and steam plates are safer but still require ventilation and PPE.

Creating a contained work zone may feel like overkill, but it’s essential for protecting your family and property. When you’re ready, work in small sections so you can control dust and clean as you go.

Choosing Safe Removal Methods

Different surfaces and projects call for different techniques. Always choose the method that generates the least dust or fumes.

Wet sanding and scraping (preferred)

For most DIYers, wet methods are the safest. Lightly mist the surface with water to keep dust down, then use wet‑and‑dry sandpaper or a hand scraper to remove paint. Collect the paint paste or chips in a container as you go, and frequently wipe tools to prevent buildup. Wet scraping is labour intensive, but it minimises airborne dust and is suitable for woodwork, plaster and small areas.

Chemical paint strippers

Low‑toxicity chemical strippers are useful on detailed mouldings or ornate trims. They soften the paint into a gel that can be scraped off. Always wear gloves and goggles, ventilate the area, and follow the product instructions precisely. Dispose of the gel safely, as it contains concentrated lead.

Power sanding with HEPA vacuum

Professionals often use electric sanders with high‑efficiency particulate air (HEPA) vacuum attachments. These machines capture dust as they work, but they require skill and careful handling. If you choose this method, use a HEPA‑rated filter and empty the vacuum safely. Never power‑sand lead paint without a HEPA system.

Peel‑away or paint‑eating gels

Some products are applied to lead paint and then covered with paper; after a set time you peel off the paper and the paint comes with it. These systems reduce dust and may remove several layers at once. They work best on flat surfaces and may need a follow‑up scrape to remove remnants.

Water blasting (exteriors only)

Water blasting can strip paint while minimising dust. If you use this method on exterior surfaces, lay plastic under the work area to catch chips and prevent contamination of soil and drains. Collect and dispose of all debris properly. Avoid abrasive blasting on buildings constructed before 1970, as it can generate hazardous dust and damage substrates.

Methods to avoid

  • Dry sanding or grinding without extraction: This produces large volumes of airborne dust quickly and is extremely hazardous.
  • Open‑flame burning and high‑heat guns: These can vaporise lead and introduce a fire risk.

Cleaning up and disposing of waste

An effective clean‑up eliminates residual lead dust. Once you’ve removed the paint from a section, pause to clean before moving on:

  1. Fold up drop sheets: Carefully roll or fold plastic sheets inward so dust and chips remain inside. Lightly mist the sheeting to keep dust from becoming airborne. Double bag the folded sheets in heavy‑duty rubbish bags.
  2. HEPA vacuum surfaces: Vacuum the floor, walls, window sills and any horizontal surfaces with a HEPA‑filter vacuum. Avoid using standard household vacuums, as they can blow fine particles back into the room.
  3. Wet‑wipe everything: After vacuuming, wipe surfaces with a damp cloth and a mild detergent. Rinse the cloth frequently and change the water often to avoid spreading contamination. Once dry, vacuum again.
  4. Dispose of debris properly: Seal all paint chips, used PPE, filters and rags in sturdy plastic bags or containers. Small amounts of debris can usually go in your household rubbish, but check local council regulations for hazardous waste. Never burn lead paint debris, as burning releases lead fumes.
  5. Final checks: When the area is clean and dry, wipe a clean white cloth over surfaces. If you see grey or chalky residue, repeat the cleaning process. Let the room ventilate, then remove plastic barriers.

Thorough clean‑up is the most important step in protecting your household long term. Even tiny amounts of residual dust can pose a risk to children and pets.

After the Job: Staying Safe

Once the hazardous paint is gone, take a few additional steps to ensure your home remains healthy:

  • Repaint with lead‑free products: Modern paints sold in New Zealand must meet strict lead limits. Apply a suitable primer to seal any remaining microparticles, then finish with high‑quality interior or exterior paint. For advice on colours or finishes, see our interior painting service and exterior painting service.
  • Health checks: If you had significant exposure or have any concerns, consider a blood lead test for yourself and family members. Early symptoms of lead exposure can be subtle, so testing provides peace of mind. Contact your doctor or local public health unit for advice.
  • Dispose of contaminated clothing: Wash reusable protective gear separately or discard coveralls and filters in sealed bags. Clean the work area regularly for several weeks; wet‑mopping floors helps capture any dust that settles later.
  • Monitor pets and gardens: Pets can ingest dust or chips from contaminated soil. Keep them away from the work zone and clean their paws. If exterior work has contaminated soil, remove the top layer where children play or where vegetables are grown.

Why Hire Painting Professionals?

Although it’s possible to remove lead paint yourself, the process is labour‑intensive and carries serious health risks. Hiring experienced professionals like Qualified Painters ensures that:

  • Proper containment and equipment are used: We employ industrial‑grade HEPA sanders and dust extraction systems, and we build full enclosures when required.
  • Compliance with regulations: Our team follows WorkSafe guidance and stays up to date with the latest standards, including the 2025 lead content limits.
  • Efficient, thorough work: Professionals can complete the job more quickly, minimising disruption to your home. We also dispose of hazardous waste safely and repaint with premium, lead‑free coatings.
  • Peace of mind: You can be confident that your family is protected and that no hidden lead remains to cause problems later.

If you’re considering removing lead paint or planning a renovation that might disturb older coatings, get in touch with us. We can inspect your property, advise on the safest approach and provide a free quote. Visit our How to Prepare for Interior House Painting guide for tips on planning any painting project, and reach out via our contact page to discuss your needs.

Lead paint is a serious but manageable hazard. By testing early, choosing the appropriate response and taking meticulous precautions, you can protect your family from harm. While DIY removal is possible with time, patience and the right equipment, many homeowners find that hiring professionals like Qualified Painters is the safest and most efficient path. Once the old paint is removed and replaced with modern, lead‑free finishes, you’ll have peace of mind knowing your home is healthier for everyone.

Contact us
close slider