How To Prepare & Prime Gib® – Plasterboard Dust Removal & Priming Before Painting

Dots
Posted by: qpaint_admin / July 13, 2025

A great interior paint job in Auckland or Wellington starts with two simple but vital actions: removing every trace of plasterboard dust and sealing the surface with the right primer. Skip either step and even premium paint will look blotchy, peel early, and cost you extra coats. Follow the guide below for rock-solid, professional results that stand up to Auckland humidity and Wellington’s blustery cool spells.

The process takes patience, yet it pays you back with walls that stay smooth and vibrant year after year.


Step 1: Eliminate Dust For A Flawless Start

Loose dust might seem harmless, but it wrecks adhesion and turns paint into sandpaper under your roller. The goal is zero residue.

Why Dust Is Biggest Enemy to Plasterboards

  • Fine plaster particles cling to fresh joint compounds.
  • The powder mixes into wet paint, forming tiny lumps that catch light and create dull spots.
  • Dust trapped under paint can wick moisture and lead to peeling.

Top-Down Technique

  1. Ceilings
    A clean, soft dust mop on an extension pole lets gravity work for you. Wipe gently so particles fall away instead of floating.
  2. Walls
    Starting at the ceiling line, sweep downward in slow passes. Keep the mop or broom clean by knocking dust into a bucket or vacuum nozzle every few strokes.
  3. Corners and recesses
    Switch to a small sash brush around coves, electrical boxes, and window returns. Elbow grease here prevents rounded paint edges later.
  4. Floors and fixtures
    Finish with a shop-vac fitted with a brush attachment. Pay close attention to skirting boards and the tops of door frames where dust likes to hide.

Extra Tips For Kiwi Homes

  • On fine days above 13 °C, a leaf blower set on low helps chase stubborn powder out of corners. Wear a respirator and goggles.
  • If recent rain raises indoor humidity, run a dehumidifier first. Dry dust is lighter and easier to remove.

Step 2: Understand Why Primer Is Non-Negotiable

Primer is not optional paint in disguise. It is a specialised sealer that solves four problems common to new Gib® boards.

  1. Seals porous surfaces – Unsealed plasterboard drinks liquid from finish paint, causing patchy colour and flashing. Primer lays down a uniform film so topcoats cure evenly.
  2. Improves adhesion – A quality sealer grips microscopic gypsum fibres, giving finish coats something to bite. This bond resists steam in bathrooms and temperature swings near exterior walls.
  3. Levels the surface – Joints filled with stopping compound dry at a different rate than factory paper. Primer evens those absorption rates to avoid dull stripes.
  4. Saves time and money – A 10-litre pail of primer costs less than finish paint. One solid coat can remove the need for a third colour coat, slicing labour hours.

Step 3: Pick The Correct Primer For New Zealand Conditions

PVA Primers

Polyvinyl acetate formulas are purpose built for fresh drywall and Gib®. They flash off quickly, lock down fine dust, and dry to a dead-flat white that highlights imperfections for easy touch-ups. Look for Dulux Professional Total Prep, Valspar PVA Primer, or similar lines sold nationwide.

Acrylic Sealer-Undercoats

Where a deeper base tone or added filling power is needed, choose an acrylic sealer-undercoat such as Resene Broadwall Surface Prep & Seal or Dulux Precise ASU. These leave a slightly satin film that improves hold-out for deep colours in living rooms and galleries.

The Mist-Coat Debate

Some guides suggest thinning interior matte paint with water to create a “mist coat.” It works in a pinch, yet it rarely matches the consistency and adhesion of a dedicated sealer. Our crews stick with true primers for predictable drying and easy sanding.

Rule of thumb: Stay water-based for Gib®. Oil primers are harder to clean and release more odour than needed in modern, ventilated homes.

Step 4: Toolkit For Fast, Clean Application

  • 10 L primer, mixed for 3-5 min
  • Two 2.5 in (63 mm) cutting-in brushes
  • 18 in (450 mm) roller cage with 12 mm nap sleeve
  • Wide roller tray plus 1 L pail for edges
  • Aluminium extension pole
  • 180-grit sanding sponge
  • Painter’s tape, drop cloths, nitrile gloves, respirator, and safety specs

Lay drop clothes tight to skirting boards before opening the can. Keep a damp rag nearby to grab drips fast.

Step 5: Prime Like A Qualified Painter

Cutting In

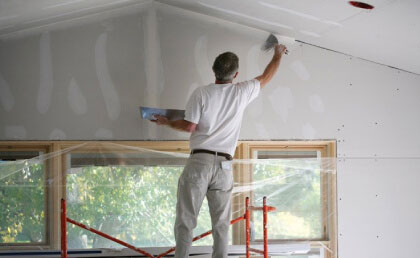
Stir primer once more and decant a liter into the pail. Dip the brush 30 mm, tap off surplus against the inside rim, then draw a steady line along ceilings, corners, and around fittings. Two light passes beat one heavy, runny pass every time.

Rolling Ceilings And Walls

  1. Load the roller evenly, then roll off excess on the tray’s ridges.
  2. On ceilings, work in one-metre squares using a large “W,” then fill the center. Finish each section by lightly laying off in one direction to reduce lap marks.
  3. Move to walls while the ceiling edge is still damp. Feather the roller into the cut-in band for a seamless merge.
  4. Maintain a wet edge, reload often, and avoid pressure that forces air bubbles.

Drying, Sanding, Second Coat

Most water-based sealers dry to touch in an hour, yet always follow the label and local temperature. Once dry, glide a gloved hand across panels. If you feel rough grit, scuff lightly with the sanding sponge, then vacuum again.

A second primer coat is wise when chasing a Level 5 finish, aiming for ultra-smooth walls in critical lighting such as stairwells or offices with large windows. Apply it exactly like the first.

Step 6: Aim For High Level Finishes In Premium Spaces

Level 5 means a flawless surface free from joint shadowing when viewed at sharp angles. In media rooms, showrooms, or anywhere strong light grazes the wall, spend the extra hour on coat number two plus a quick pole sand. The result rivals commercial plasterboard finishes without the giant price tag.

Local Insight: Factors In Auckland & Wellington

  • Humidity swings in coastal Auckland call for careful drying times. If overnight moisture lingers, run gentle heat or a dehumidifier before starting topcoats.
  • Wind-driven chills in Wellington can slow primer cure. Keep rooms above 10 °C, and avoid opening windows too wide too soon.
  • Both regions face salt air. A sealed, bonded surface prevents early corrosion on any exposed fasteners.

Qualified Painters crews schedule prep to suit local weather patterns, so projects stay on track all year.


Finish Strong: Call Qualified Painters

Dust removal and priming are the silent heroes of every stunning interior repaint. They stop peeling, cut repaint cycles, and let premium colours pop.

Qualified Painters tackles the messy part for you: Gib® fixing and stopping, meticulous vacuum sanding, high-build priming, and the final splash of colour. We service homes and businesses, bringing punctual crews, tidy work habits, and a workmanship guarantee.

Ready for walls that stay picture perfect? Book your free site visit today and let us lift your space from average to outstanding.

Contact us
close slider